Alright, let’s get into how I put together my Town Hall 10 base. It took some fiddling, like always, but here’s the rundown of what I did.
Getting Started: The Clean Slate
First thing, I cleared out my old TH9 layout completely. Just wiped the slate clean. It’s easier for me to start fresh when upgrading the Town Hall, especially with new defenses coming in. I needed space to think and place those big new items like the Inferno Towers.


Placing the Core Stuff
Okay, so the absolute must-haves needed to go down first. For me, at TH10, that means:
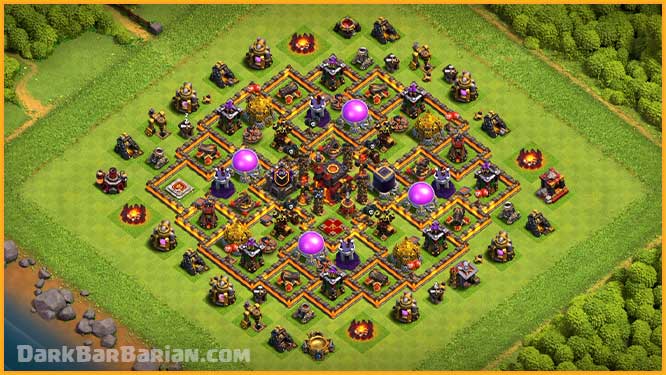
- Clan Castle: Dead center. Always. You want those CC troops pulling attackers right into the middle mess.
- Dark Elixir Storage: Right next to the CC, or very close. Protecting DE is huge at TH10, that stuff is gold.
- Town Hall: I put mine fairly central too, maybe slightly offset depending if I’m protecting resources more or trophies. For this one, I kept it near the core.
- Inferno Towers: These are the big boys. I placed them near the core, covering the DE storage and Town Hall. Crucially, I made sure they couldn’t both be zapped by Earthquake spells easily. I set one to single-target (to melt tanks and heroes) and one to multi-target (to handle swarms like miners or hogs).
Building Outwards: Key Defenses
With the core down, I started layering outwards.
X-Bows: Got those placed next. Positioned them to cover a wide range, including approaches to the core and hitting both ground and air. Made sure they overlapped fields of fire with the Infernos where possible.
Air Defenses: Spread these out in a rough square or pentagon around the core. You don’t want ZapQuake taking out multiple ADs easily. Gotta protect against LaLoon attacks.
Wizard Towers: These went near storages (besides the DE one) and also where Balloons or Hogs might path. Good splash damage is key. I tried to keep them away from the Air Defenses so attackers couldn’t target both easily with hounds or loons.
Filling the Gaps: More Defenses and Walls
Now it was time to fill in the rest.
Archer Towers and Cannons: Sprinkled these around. Archer Towers provide good anti-air support, so I spread them evenly along the outer edges and inner compartments. Cannons filled the remaining ground defense spots.
Mortars: Placed these more towards the outside layers. They’re slow but good against ground swarm troops if they can get a shot off.
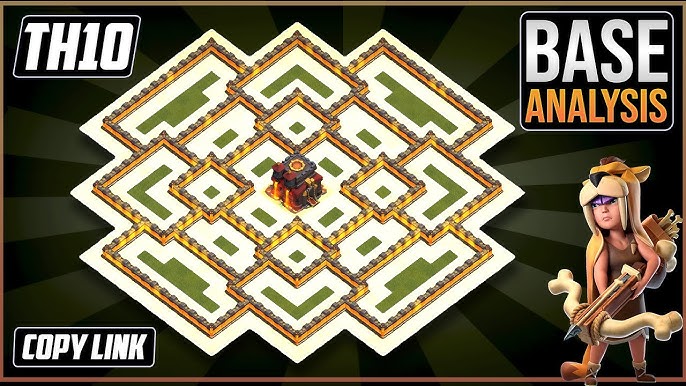
Walls: This is the tedious part. Started laying down walls, creating compartments. Lots of compartments are generally good at TH10 to slow down ground attacks. Made sure the core compartment housing the DE, CC, TH, and Infernos was really solid. Then built outer layers, trying to make pathing awkward for attackers.
The Final Touches: Traps and Trash Buildings
Last steps involved the sneaky stuff and the funneling buildings.
Traps: This needs thought.
- Giant Bombs: Placed pairs of them where I thought Hog Riders or Miners might go, ideally between defenses.
- Spring Traps: Put these between defenses too, aiming to fling troops off the map.
- Seeking Air Mines: Dropped these near Air Defenses to target Lava Hounds or Dragons.
- Air Bombs: Placed these near Wizard Towers or areas where Balloons might clump up.
- Skeleton Traps: Set some to air, some to ground, placed them near the core or near Infernos to distract heroes or key troops.
Other Buildings: Storages (Gold/Elixir), Collectors, Barracks, Army Camps, etc. I used these on the very outside to form a “trash ring”. This helps funnel attacking troops into predictable paths, right into the teeth of the defenses and traps. It also makes attackers waste time clearing them.
Testing and Tweaking
No base is perfect on the first try. I watched replays from defenses, saw where it failed, and moved things around. Maybe adjusted trap placements, shifted a Wizard Tower, or changed an Inferno mode. It’s a constant process of refining based on what attacks you’re seeing.
So yeah, that’s pretty much the process I went through. It’s holding up reasonably well for now, protecting my Dark Elixir most of the time which is the main goal!


